This post contains affiliated links.


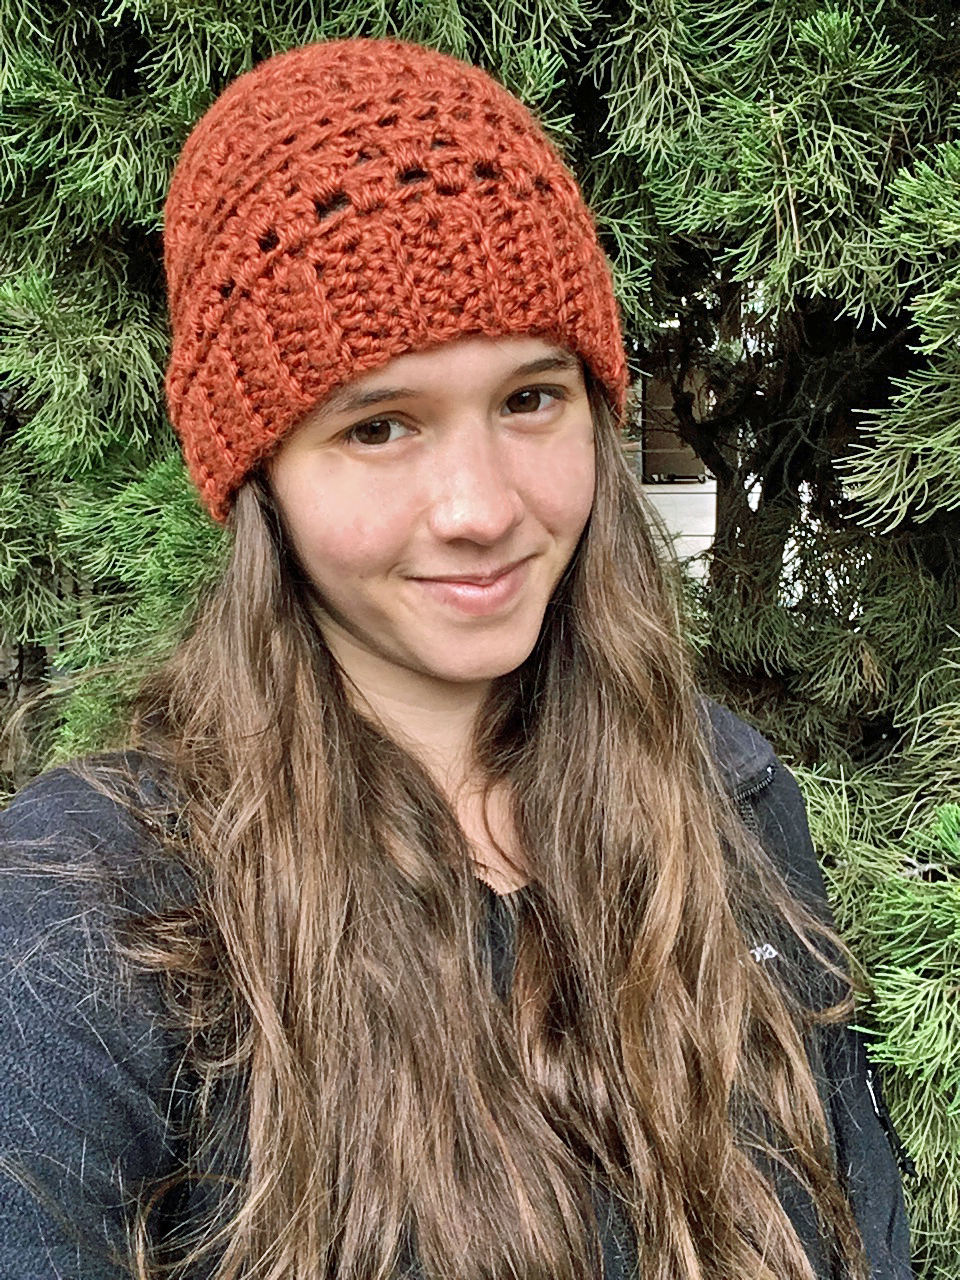
Today I’m back here with a brand new pattern for you all- introducing The Wilderness Beanie! This beanie features a few basic crochet techniques including the puff stitch and working in the back loop while doing a half double crochet stitch. If you haven’t used these techniques before don’t worry! They are pretty simple techniques, but they do give great texture.
The Wilderness Beanie is a super easy pattern that I think anyone of any skill level could do. If you are just learning to crochet or would like a refresher of the basics check out my post 5 things every crochet beginner needs to know.
This pattern was inspired by Lionbrand’s Heartland yarn collection. You can shop this yarn here through my affiliated link. I love the colors in this collection and I really love that they were each inspired by a National Park and the outdoors. For those of you who do not know, I am a college student studying environmental science and biology. I would love to work at a National Park when I graduate. I am a big advocate for conservation and protecting our amazing natural resources. So this pattern is also inspired by my love of the outdoors and our beautiful National Parks.
The color I chose for my beanie is the color Yosemite (rust color). Now I normally don’t lean towards oranges, but this color really attracted me because of the name. I visited this National Park when I was a kid and it was one of the most fun experiences. This yarn is a worsted weight yarn, which gives this beanie nice structure along with warmth. It’s also a soft yarn which seemed perfect for a beanie!
I really can’t express enough my love for this yarn and its celebration of our National Parks. I really encourage all of you if you haven’t done so already to go and visit a National Park and experience first hand the beauty of our natural resources.
For this pattern you will need the following:
– Lion brand’s Heartland yarn in any gorgeous color
– Crochet hook size J/ 6.0mm
– Yarn Needle to weave in the ends
– Scissors
– Stitch markers (optional)
If you would like an ad-free, printable PDF version of this pattern you can get this pattern on Ravelry. Thank you so much for helping support my small business!
Pin this pattern for later!
Pattern:
For the band:
Chain 7
Row 1: Hdc in the 2ndloop from the hook and in each stitch across (6).
Row 2; Ch 1 and turn. Hdc in the back loops only in each stitch across (6).
Row 3: Ch 1 and turn. Hdc in each stitch across (6).
Repeat rows 2-3 until band is desired length. See chart for approx. sizing.
Once band is desired length, place the two ends together and slip stitch up form the band into beanie shape. Do not tie off.


For the Beanie:
Ch 1 and hdc in each stitch across. For the example shown (size adult small) I had 45 hdc here.
Round 1: Ch 3. Place one puff stitch into the first stitch. Ch 1, skip 1 stitch, and place a puff stitch in the next space. *Ch 1, skip 1 stitch, and place one puff stitch in the next stitch. * Repeat between ** until you get back to the beginning of the round. Ch 1 and slip stitch into the top of the ch 3.
Round 2: Ch 3. Place one puff stitch in the ch 1 space of the precious row. *Ch 1 and place one puff stitch in the next ch 1 space created by the previous row. * Repeat between ** until the end of the row. Ch 1 and slip stitch to the top of the ch 3.
Round 3: Ch 1. Hdc in each stitch around. Slip stitch to the top of the ch 1.
Round 4: Ch 1. Hdc in the back loops only of each stitch around. Slip stitch to the top of the chain 1.
Round 5: Ch 1. Hdc in the back loops only of each stitch around. Slip stitch to the top of the chain 1.
Repeat rounds 1-5 until beanie is desired height. See sizing chart above.
Finishing:
Cut the yarn from the ball and leave a long tail for weaving in. Sew back and forth in each stitch around. When you get to the end, pull the tail so the beanie will scrunch together. Finish by sewing the top shut. See image below.


Optional: Add a faux fur pom pom to the top! For a tutorial on how to do this check out my tutorial here.
That’s it! I hope you enjoyed this pattern. Feel free to sell any items made from this pattern, but I do ask that you give me credit as the designer. I’d love to see your finished projects! Share them with me on social media. You can find me on Facebook, Instagram, Pinterest and here on this blog!
Happy Stitching!
– Jessica


