
This post may contain affiliated links. As an affiliate member I may make a commission at no extra cost to you.
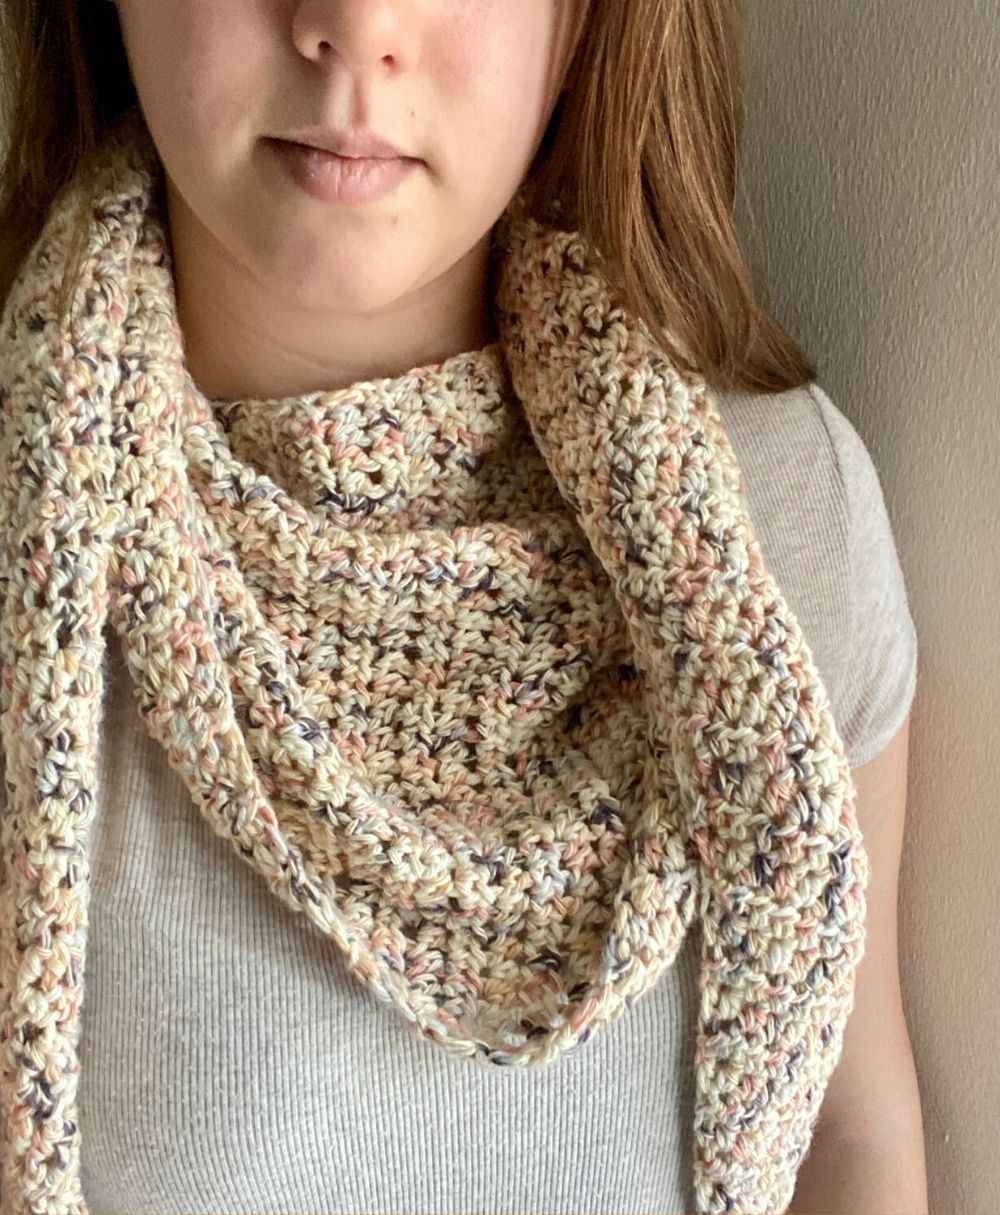
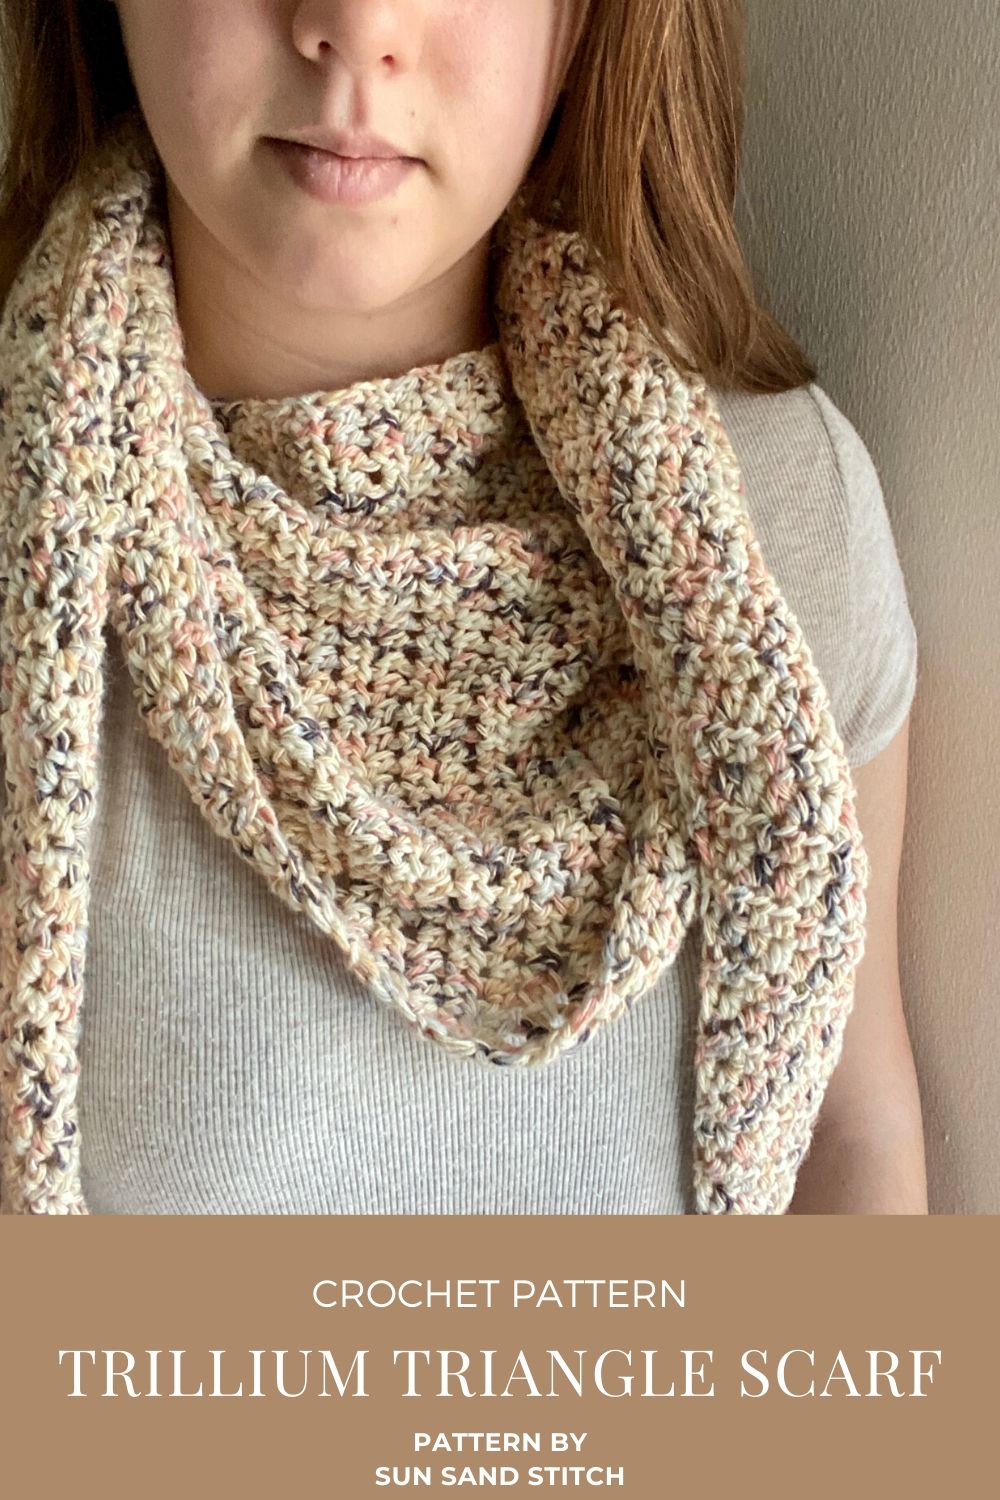
I’m very excited to introduce to you my latest pattern; and its a triangle scarf! I LOVE triangle scarves (if you didn’t know). One of the very first patterns I released was the boho triangle scarf. It is one of my all-time favorite patterns! But now she has a sister- the trillium triangle scarf!
This pattern is the perfect beginner pattern if you’ve never made a scarf before. It’s also a great accessory to transition from spring into summertime. This scarf is lightweight, simple, and can be paired easily with any outfit.
The inspiration for this design comes from the trillium flower. The trillium flower is a simple 3-petaled flower that resembles the shape of a triangle.
Save this pattern for later on Pinterest!
Get the ad-free PDF on Ravelry or Etsy!
Materials:
– 1 skein of Lion Brand Comfy Cotton yarn (yarn pictured is the color Chai Latte) or approx. 310 yards of worsted weight #4 yarn
– Size J/ 6 mm crochet hook (or hook to obtain gauge)
– Stitch marker (highly recommended to keep track of the increasing/decreasing side)
– Scissors
– Yarn needle
Pattern Notes:
– This pattern is written in US terms
– Ch 1 at beginning of row does not count as a stitch
– This pattern is worked by increasing on one side and then decreasing on the same side to create a triangle shape.
– Numbers in parentheses at end of each round indicate number of stitches for that row
Stitches:
Ch = Chain
Hdc = half double crochet
Hdc2tog = half double crochet 2 stitches together
Sl st = slip stitch
Stitches Explained:
Hdc2tog: Yarn over and insert hook into the first stitch, pull up a loop, yarn over and insert hook into the next stitch, yarn over and pull up a loop, yarn over and pull through all 5 loops on hook.
Gauge:
4 inches = 13 stitches x 9 rows
Finished Measurement:
Finished product measures approx. 67 inches x 12 inches.
Pattern:
Ch 3.
Row 1 (begin increasing): Hdc in the 2nd chain from the hook. Hdc in the next chain (2).
Row 2: Ch 1 and turn. 2 Hdc in the next stitch. Hdc in the next stitch (3).
Row 3: Ch 1 and turn. Hdc in each stitch (3).
Row 4: Ch 1 and turn. 2 hdc in the first stitch. Hdc in each stitch to the end of the row (4).
Row 5: Ch 1 and turn. Hdc in each stitch (4).
Row 6-51: Continue increasing by repeating rows 4-5.
Row 52: Ch 1 and turn. Hdc in each stitch (28). Row 53 (begin decreasing): Ch 1 and turn. Hdc2tog in the first 2 stitches. Hdc in each stitch to the end of the row. Place a stitch marker in the first stitch of this row. This will mark your decreasing side (27).
Row 54: Ch 1 and turn. Hdc in each stitch. Move your stitch marker to the first stitch of this row. Continue to move the stitch marker up as you decrease. This will help to keep track of the decreasing side (27).
Row 55: Ch 1 and turn. Hdc2tog in the first 2 stitches. Hdc in each stitch to the end of the row (26).
Row 56: Ch 1 and turn. Hdc in each stitch (26).
Row 57- 124: Repeat rows 55-56.
Row 125: Ch 1 and turn. Hdc2tog in the last 2 stitches.
Cut yarn and weave in tails with a yarn needle.
That’s it! I hope you enjoyed this pattern. Share your finished projects with me on social media!
Facebook: Facebook.com/SunSandStitch
Instagram: Instagram.com/SunSandStitch
Pinterest: Pinterest.com/SunSandStitch
Feel free to sell finished pieces made from this pattern, but I do ask that you reference me as the designer. Please do not use my photos.
Happy Stitching!
Jess