For those of you who are not in warm climates (like me in San Diego) we can dream of winters full of cold air and snowfall. For those of you lucky enough to live in those cooler climates I’ve got a pattern for you!
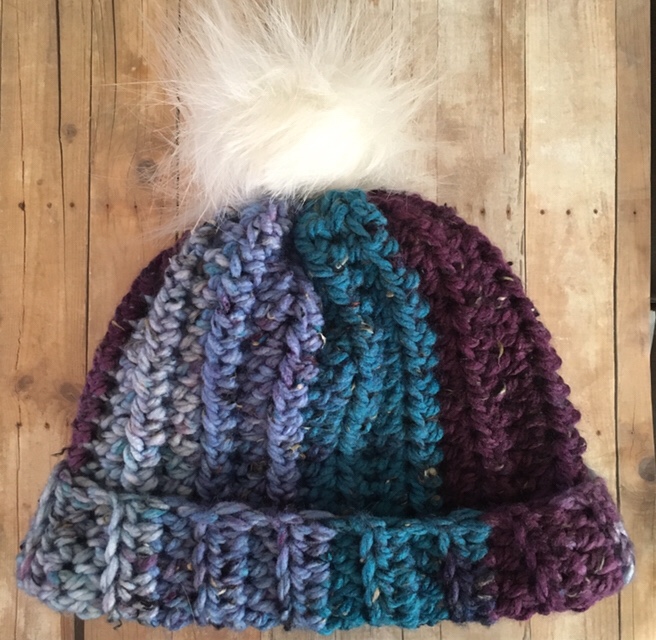
This beanie is the perfect hat for winter. It combines soft yarn, keeps you warm and has a super cute faux fur pom-pom! (I mean who doesn’t love a fur pom-pom?) Faux fur in general has become very popular in winter fashion.
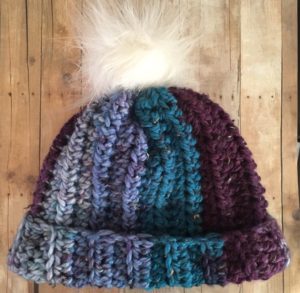
New to crocheting? You can make this beanie! This pattern is very beginner friendly!
You may also be interested in my post 5 Things Every Crochet Beginner Needs to Know. This post goes over everything from types of yarn to gauge! All the information in this post comes from my experiences as a new crocheter and what I wish I knew at the start (I had to find out the hard way!)
If you would like to support my small business and the work that went into this pattern, consider purchasing the PDF on Ravelry. The PDF also includes a step-by-step photo tutorial for how to create the fur pom-pom.
Materials:
Chunky (size #5) yarn. I recommend Loops & Threads Charisma yarn.
(Note: The amount of yarn needed will vary depending on the size made. Yardage: 40-100 yards. The smaller sizes will use less yarn than the larger sizes.)
Size K/ 6.5mm crochet hook
Small amount of worsted weight yarn (size #4) in a color that will match your hat.
Yarn needle
Scissors
Faux Fur (optional- for making pom-pom)
I really love the texture of Loops & Threads Charisma Tweed Yarn. I used the color mountain lake.
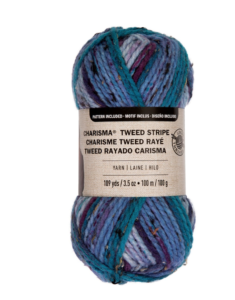
Image via Michaels.com
Stitches used:
Hdc- half double crochet
Ch- chain
St- stitch
Sizing Chart:
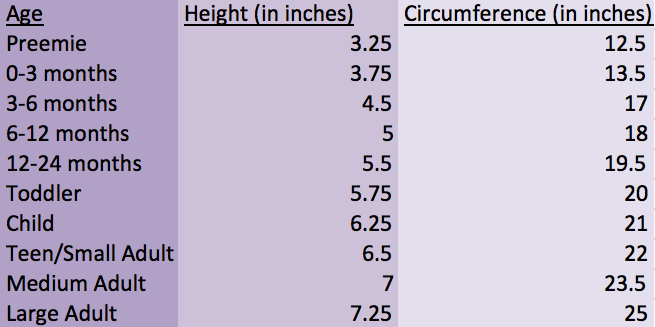
Note: Based on the size you are making, make a chain that measures the hat height. For example, if you’re making the teen/small adult size your starting chain would measure 8 inches long.
Gauge:
A 4×4 inch square will be 10 stitches by 6 rows.
Pattern:
Create your initial chain based on the sizing chart above.
Row 1: Ch 1. Hdc in the second st from the hook. Hdc in each stitch across.
Row 2: Ch 1 and turn. Hdc in the back loops only in each st across.
Row 3: Ch 1 and turn. Hdc in each st across.
Repeat rows 2-3 until hat measures the circumference listed in the chart. So if you’re making the teen/small adult size you would continue rows 2-3 until your rectangle measures 22 inches.
Be sure to leave a long enough tail for sewing.
Assembly:
Fold the rectangle in half and sew up the sides. You can sew using the mattress stitch so the seam is not visible.
Use the remainder of the tail to sew back and forth in the top of the beanie. When you have sewn all the way around pull on the tail to tighten up the top. This will cause the top of the beanie to scrunch together.
At this point you can leave the beanie as is or continue through the pattern to attach a fur pom-pom.
Making a faux fur pom-pom:
Making this pom-pom isn’t as hard as it looks. It’s easy to make and adds to the overall look of your beanie. First you will need a piece of faux fur. You can get these from any craft store. I am using this fur.
- Draw a circle on the backside of the fur.
***Note: The larger the circle you make the larger the pom-pom will be. Upon assembly, the pom-pom will condense about an inch. So if your initial circle is 6 inches you will have a 5-inch pom-pom.
- Cut out the fur circle.
- Using a sharp yarn needle and your corresponding worsted weight yarn, sew around the edge of the circle using a basic back and forth stitch.
- Pull on the yarn to scrunch the pom-pom into shape.
- Using the remainder of the worsted yarn, attach the pom-pom onto the top of the beanie.
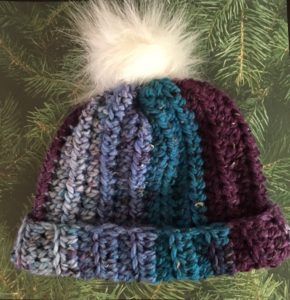
I hope you enjoyed this pattern! I’d love to see your finish projects. Share them with me online. You can find me on Instagram, Facebook, Etsy and my blog. Feel free to sell items made from this pattern, but I do ask that you reference me as the creator.
Happy Stitching!
-Jessica

How to: Fur Pom Pom – Sun Sand Stitch
[…] Love the beanie above? I have a pattern for it! Check it out here. […]